


How to Attach Ledger Board on Siding
When laying out your new deck plans, the first thing on your installation list is the ledger. The ledger is a header that transfers the weight of the deck to the framing and foundation of your house. A ledger should be installed on concrete, brick, or a block, but what happens if the side of your house is covered in siding? First things first: never install a ledger on top of house siding. This is extremely dangerous and does not offer you any structural integrity. Instead, cut off a section of siding so ledger can be in complete contact with house. Make sure to install flashing under the siding, extending over the ledger, the flashing prevents the build up of moisture, which causes rotting.
Here are the steps to take when installing a ledger on a home with siding:

Mark the spot where you want the ledger to sit.
- Mark The Top Of The Ledger: Make a mark where the top of the deck should be, the mark should be 1-3 inches below that for the ledger.

Use a water level to ensure the ledger length is level.
- Mark The Ledger Length: Set a water level on mark done for the ledger board, then make another at a point longer than the length of the ledger. Do both sides like this, then snap a chalk line in the middle but add 1 ½ inches to the length of the ledger.

Check your lines to ensure everything is leveled and adjust if needed.
- Check for Level: Snap a chalk line between both ledger marks to ensure they are level.
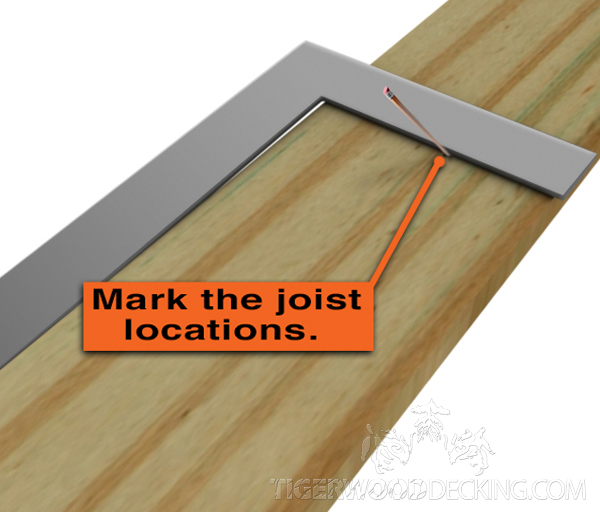
Make marks on the ledger where the joists will be situated.
- Mark Joist Locations: Make a mark on the ledger for the joist spacing. Spacing is usually 12 to 16 inches on center. Don’t forget to leave room for rim joists on the end of the ledger.
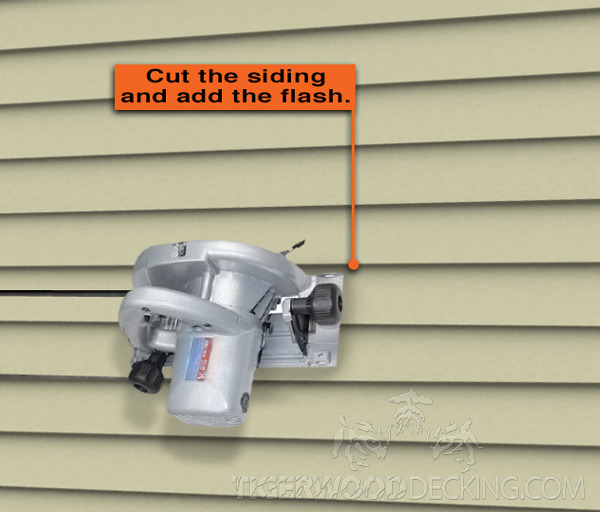
After cutting the siding with a circular saw, install the flashing.
- Cut Siding and Flash: First, ensure your circular saw is equal to the thickness of the deck, then cut the ledger outline. Slide the flashing underneath the siding 1 inch. Overlap flashing by 3 inches and cut it for the doorway.

Use a nail as a temporary place holder to check the ledger to see if it’s leveled.
- Level the Ledger: Place the ledger in the cut out area, ensuring it’s centered, and leave 1 ½ inches on each side for rim joists. Nail one end of the ledger with 10d nail or deck screw, keep in mind this is not the final fastener for the ledger, then level the other end and do the same.

Begin marking the positions for the fasteners.
- Mark for Fasteners: Starting around 2 inches from one end, mark fastener locations every 18 to 24 inches. It’s okay to have a fastener marked at a joist location.

Drill pilot holes for the lag bolts, these will be the final fasteners.
- Drill Pilot Holes: Start to drill the pilot holes into the ledger, at ¾ inch into studs, for the lag screws. Secure lag screws into the holes with a socket wrench.

After installation, it’s important to seal the ledger and the flashing to help prevent water damage.
- Seal the Edges: After allowing the ledger to settle overnight, securely fasten the screws a second time, but don’t over tighten. Seal the counterbores, the top of the flashing, and underneath the ledger with outdoor silicone caulk.
Installing a ledger may reduce your costs, but it’s time consuming and requires you to have a certain skill set. As always if you are unsure about decking installation, contact a local licensed contractor for the installation. You definitely don’t want to find yourself taking on more than you can handle.
To see how we can assist you in your next decking purchase, check out our extensive line of Tigerwood Decking products!
Installing a Ledger on Stucco
Stucco is a little easier to attach a ledger board to because you don’t need to remove the stucco like you would with siding. The only thing that needs to be cut on the stucco is a groove that the ledger sits inside of.
BEFORE YOU BEGIN ANY DECKING PROJECT IT IS CRUCIAL THAT YOU CHECK WITH LOCAL BUILDING CODES. IF YOU ARE UNSURE OF YOUR ABILITY TO DO ANY DECKING INSTALLATION CALL A LOCAL LICENSED CONTRACTOR.

Cut a groove and insert the flashing for your ledger on stucco installation.
- Cut a straight line an inch into the stucco with circular saw.
- Insert flashing into the groove that was just cut.
- Predrill holes in the stucco and ledger.
- Fasten ledger to the house with lag screw.
- Seal the top of the flashing with silicone caulk.

After the ledger and flashing are installed, it’s important to seal the flashing.
After completing these steps you will have a sturdy ledger board attached to your stucco wall. Ensure the caulk is completely dry and sealed. Lag bolts should be tightened but only as tight as the socket wrench lets you. Do not over tighten lag bolts.
To check out or gorgeous line of Tigerwood Decking, or to see what other kinds of accessories we offer for any and all decking projects visit our Tigerwood Decking Products page!
How to Attach Joists & Rim Joists
Properly installing joists is crucial when building your deck. Joists are the support beams that the decking attaches to. The easiest way of building this is installing the rim joists, which are the frame of your deck, and then installing the joists in the middle. Be sure to use joist hangers when attaching the joists to the ledger and beam. Never ever rely on nails to secure your decking. Lag bolts and screws and the best, and safest, materials to secure your deck with.
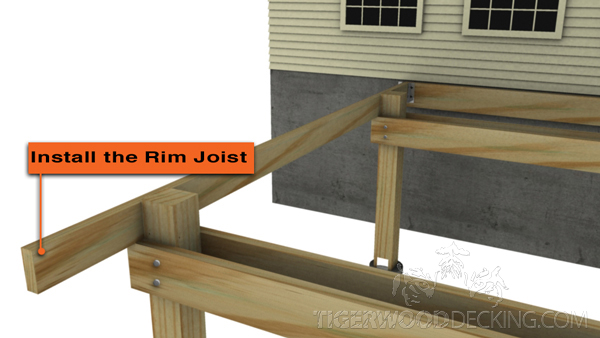
Installing the rim joists first will provide you with a frame to install the remaining joists in.
- Once all of the joists, and rim joists, are cut and measured to length, attach one end of the rim joist to the ledger with a joist hanger. The rim joists should be about 1 ½ shorter than the front to back measurement of the deck.
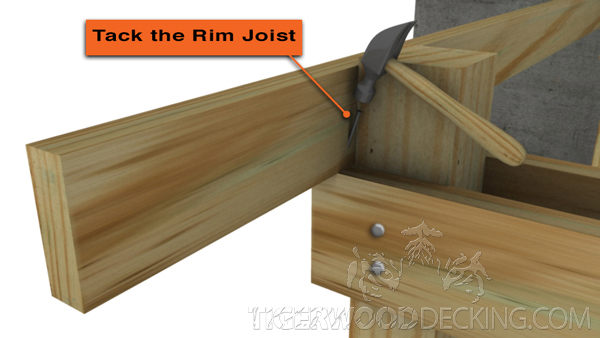
Use a nail to temporary attach the rim joist to the beam. This will NOT be the final fastener used in installation.
- Create a framing corner with the rim joist and the beam. Adjust the rim joist until it’s square with your home and is flush with the beam. Insert a nail through the rim joist and into the beam as a temporary fastener.

Header installation completes the square frame for the joist system.
- Installing the header is easily done with two people. Have the other person hold the header up so you can use a screw to attach the header to the end of the rim joist.

Marking the hanger locations makes the joist installation process go a little smoother.
- Mark the locations of the joist hangers as shown on your dimensioned plan.

Using a flange allows you to keep the joist system flush with the top and bottom of the ledger/header.
- Cut joists to length then tack a 2x flange on the top of the joist to keep it flush with the ledger and header. Line up the joists to the marked areas then slide joist hangers onto the bottom of the joist. Fasten the hanger to the ledger and header.
Repeat these steps for each joist. Ensure you are using the proper hardware for your decking that offers the best support for your decking. As always if you are unsure of decking installation contact a local licensed contractor to do the work for you. Faulty installation could result in a deck collapse, don’t take on more than you can handle!
Want to hear what others are saying about Tigerwood Decking? Check out our testimonials page!
Preventing Rot & Water Damage

Who likes deck rot? No one.
Following these few simple steps can ensure your deck will be a long lasting one.
The worst thing that can happen to your deck is a rot-producing fungus. Fungi prospers when wood is constantly moist. It slowly feeds off softer woods like cedar and pine, causing the wood to shrink and become spongy. Fungi can cause your deck to collapse or even spread through your house destroying walls and floors. Preventing your deck from these disasters is easy; here are a few things that will help you.
Using post anchors on the bottom of the posts prevents wood from coming in contact with the ground. This is crucial because the ground is full of moisture. Also note: if posts were cut they should be cleaned off before attaching the post anchors. Leaving preservatives on the end will create space for the moisture to enter and cause fungus to grow.
When installing joists for your deck, using a build-up beam is great way to reduce moisture causing fungi. A build-up beam is simply a double beam with ½ 0r 1/8 inch spacers in the middle that allow water to drain.
Butt joints are when two pieces of material meet at each end. In this case, it’s the ends of the boards meeting each other. To insure proper drainage, be sure to place the butt joints over the doubled joists. This gives water room to flow off the wood, instead of trapping it, and in return, causing fungus to grow.
The main purpose of flashing is for weather protection. Flashings are metal strips attached to the ledger. Ensure the flashings are properly sealed and installed because this creates a barrier between the decking and any damaging moisture.
Don’t waste your time and money building a moisture trap! It’s crucial to take these precautions to ensure that your decking does not become a victim to any pesky fungus.
Learn more about Tigerwood Decking and how it can benefit you on your decking project!
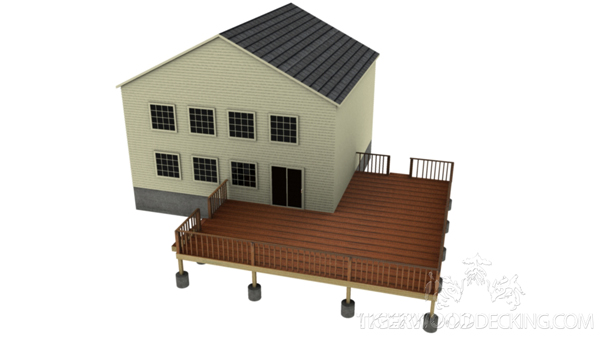
Deck Configuration – Basic Deck Plans
Deciding what configuration to choose for your deck may be stressful and confusing. Remember your deck should flow with the shape of your house. Don’t change your house to fit your deck, fit your deck to your house. Ground-level decks are less elaborate than other decking installations, and depending on your local building codes, may not require any railings because of their close proximity to the ground. If you’re looking for something that offers a little extra design; a wraparound deck, an elevated deck or a multilevel deck are some other decking options.
This versatile design allows you to have privacy on your own deck, while still being able to entertain.
Wraparound Decks:
- Faces two or more sides of house
- Solution for backyards that get sunlight at different times throughout the day
- Offers privacy in an outdoor space
- Allows for designated areas for outdoor family activities
- Great for second story houses, ground level decks and multilevel decks

This deck design allows you to utilize a sloped backyard for the perfect outdoor escape.
Elevated Decks:
- Single platform supported that’s supported by posts
- Gives access to the upper level of your home
- Enhances views that might not have been seen otherwise
- Creates additional entertainment space
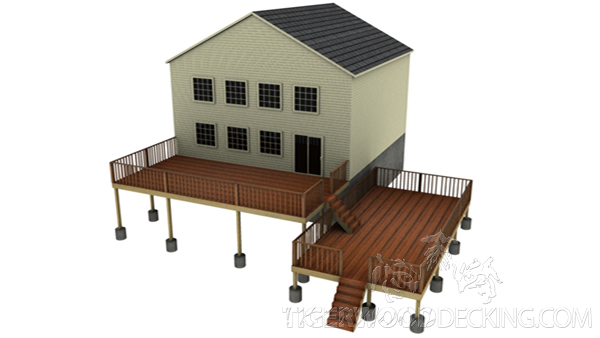
This design can also utilize a sloping terrain, provide a nice transition to different levels of your home, and have designated spaces for different activities.
Multilevel Decks:
- Combination of great views and ground level deck
- Practical solution to terrain slope
- Allows for added space, in what would otherwise be an unusable area
- Great transition to an upper level deck
- Provides designated ares for specific outdoor activities
Decks are great backyard accessories. Choosing the most realistic deck configuration for the shape of your house is an important factor. Ground level decks might be less work, but it never hurts to get a little more creative.
If you find yourself needing ideas, and want to see what other homeowners have down with their Tigerwood Decks check out our gallery page!
Deck Terminology
Decorate, a synonym for deck, is exactly what decks do for your backyard living area. Knowledge of terminology is important when building a deck. Here are some of the major terms that will help you understand how a deck is constructed and make the entire building process easier for you.
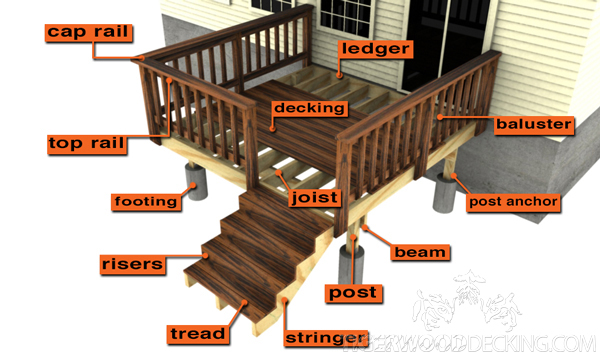
This handy guide will inform you of the basic terms of deck installation.
Beams, also known as girders carry the weight of a deck. They attach horizontally to posts to support the joists.
The floor of the deck is called the decking. It attaches to the joist creating a floor.
Concrete columns that support the deck are called footings or piers. If you live in an area susceptible to cold climates, concrete footings should be dug to frost depth. Piers are used when your deck is in an area where abundant frost is not an issue. They are set above ground for post support. To figure out footing depths contact your local building department.
Joists help support the deck, they are horizontally placed directly under the deck these boards distribute the weight of a deck.
If you are attaching the deck to your house you will need a ledger. This is horizontally placed on the side of your house to hold up one side of the deck. Ledgers also provide sturdy support for the joists.
To prevent exposure to moisture or insects attach post anchors to piers or footings. Post anchors are metal frame connectors that raise the base of the post slightly above the top of the concrete footings.
Posts are set vertically to support the beams of a deck and rest on the post anchors. In some cases they are set in a hole, before concrete is poured.
Rails provide a safety barrier, while giving your deck some personality. These rails wrap around the edges of the deck, and are also used for support when walking down stairs.
Railings consist of rails, rail posts, cap rails, balusters or spindles. Maximum space between balusters is 4 inches. It is crucial to check with your local building codes before installing a railing to ensure that it is up to code.
Risers are placed between two stair threads to enclose the space between them. This space should be no more than 7″.
Treads are the horizontal stepping surfaces of a stairway, the top of the steps.
Decking terminology is important when building a deck. Be sure to familiarize yourself with these terms and as always, if you are unsure about decking installation contact your local licensed contractor to ensure that a safe deck is constructed for you and your family.
If you are interested in using Tigerwood Decking for your next project, be sure to call or contact us today!
Tigerwood Decking
Exotic Decking that Stands Out from the Competition
Tigerwood Decking is a hardwood that lives up to its name. Boasting a gorgeous display of reddish-brown to rustyorange hues with black streaking throughout, Tigerwood™ creates decks that define the word “exotic.”
The benefits of Tigerwood Decking include:
- Up to 40% cheaper than imitation composite tigerwood
- 30+ year lifespan without harsh chemicals
- Natural beauty truly worthy of your home
- Robust performance for every season
- Low maintenance & a great value
- Proven rot, decay, & mold resistance
Recent Comments